How to use walkie talkie earpiece?- The Complete Guide to Walkie Talkie Earpiece Setup
author: z
2026-05-15

In professional communication environments—spanning security operations, hospitality management, construction sites, and large-scale event coordination—clear and discreet voice transmission is the backbone of effective teamwork. Mastering how to put on a walkie talkie earpiece correctly not only enhances audio clarity but also minimizes ear fatigue during extended shifts. This comprehensive guide explains how to wear a walkie talkie earpiece for optimal comfort, details how to use walkie talkie earpiece equipment in compliance with professional standards, and provides brand-specific recommendations for Motorola R2/R5/R7, Hytera, Yaesu, ICOM, Baofeng, Kirisun, and Caltta radios.
Earpiece Types and Brand Compatibility Overview
Before addressing how to put on a walkie talkie earpiece, it is essential to understand the compatibility between earpiece connectors and radio models. Different manufacturers employ proprietary or standardized interface designs, and mismatched accessories can result in audio distortion, intermittent connectivity, or permanent port damage.
Major Brand Connector Standards
| Brand / Series | Representative Models | Connector Type | Typical Applications |
|---|---|---|---|
| Motorola | R2 / R5 / R7 | M11 / A11 Multi-Pin | Public safety, industrial manufacturing, large events |
| Hytera | HP7 / HP6 / PT5 | Hytera Proprietary Multi-Pin | Emergency command, rail transit, energy sector |
| Yaesu | FTM-500D / FT-70D | 3.5mm + 2.5mm Dual-Pin | Amateur radio, outdoor exploration, fleet communication |
| ICOM | IC-F Series / IC-V86 | ICOM Proprietary 2-Pin | Maritime communication, aviation ground crew, amateur stations |
| Kenwood/ Baofeng | NX-1200/ NX-3320/ UV-5R / UV-82 / | Kenwood K1 2-Pin Standard | Property security, hospitality, personal outdoor use |
| Kirisun | DP Series / S Series | Kirisun Proprietary Multi-Pin | Commercial industry, PoC public network, smart campuses |
| Caltta | GH Series / eChat PoC Terminals | Type-C / Bluetooth / Proprietary Pin | Public network PoC, emergency communication, IoT |

How to Put On a Walkie Talkie Earpiece: Step-by-Step Instructions
How to put on a walkie talkie earpiece may appear straightforward, but professional environments demand attention to hygiene, mechanical fit, and concealment. The following protocol has been validated across industrial, security, and hospitality deployments.
Pre-Installation Preparation
-
Sanitization: Wipe earbud tips, acoustic tubes, and PTT surfaces with 75% isopropyl alcohol wipes; allow 30 seconds of air-drying before skin contact
-
Component Inspection: Verify that transparent acoustic tubes are free from cracks, yellowing, or hardening; confirm PTT button spring-back is crisp and responsive
-
Model Verification: Cross-check compatibility labels on packaging against your radio model (e.g., Motorola R5, Hytera PT580H)
Acoustic Tube Earpiece Fitting Procedure
-
Orientation Identification: Hold the earpiece so the acoustic tube angles naturally toward the face, with the earbud tilted for ergonomic insertion
-
Gentle Insertion: Place the silicone earbud at the ear canal entrance. Do not force it deeply into the canal. The correct fit produces a light seal without suction pressure or pain
-
Over-Ear Routing: Guide the tube along the rear contour of the pinna, using the ear's natural anatomy for physical retention rather than relying solely on canal friction
-
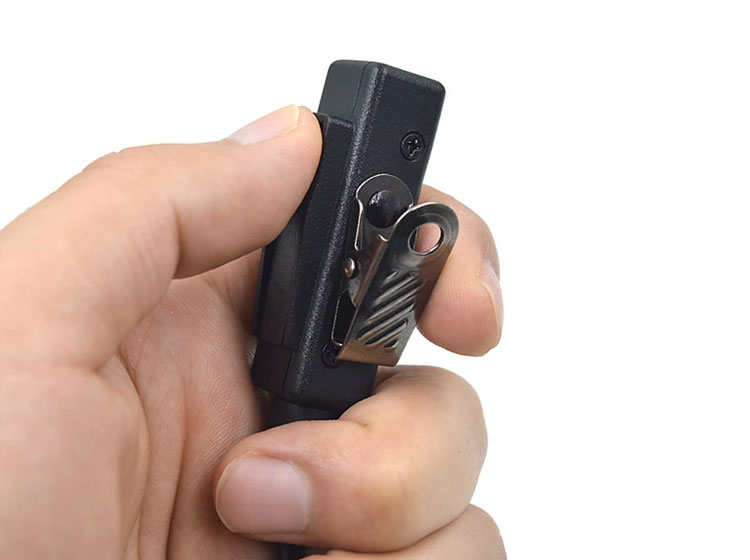
PTT Positioning: Clip the push-to-talk button to a collar or shoulder strap, maintaining 15–20 cm between the microphone and the corner of the mouth, avoiding direct exhalation paths
-
Cable Management: Secure excess wiring with the provided clip to the inner placket, preventing snagging on equipment or door handles
Over-the-Ear Hook Fitting
-
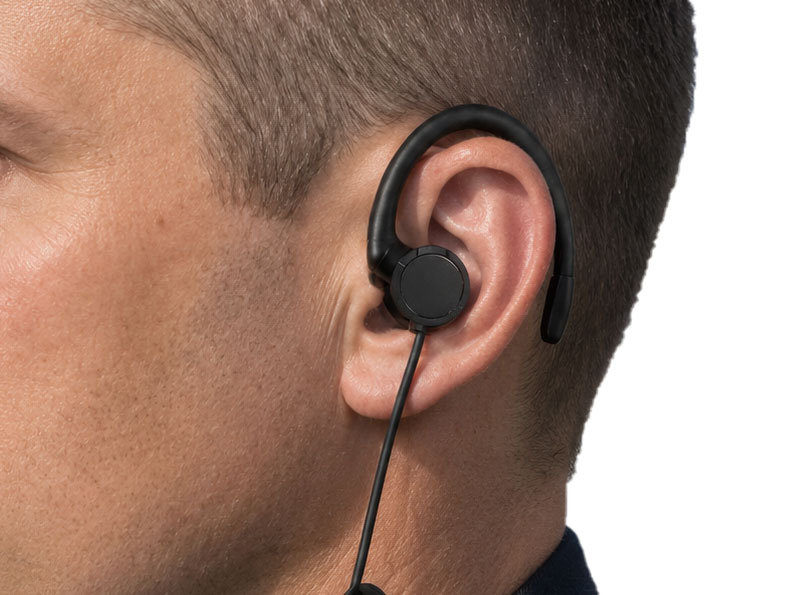
Slip the hook over the ear from top to bottom, aligning the speaker with the ear canal opening
-
Adjust the flexible hook curvature to match individual ear anatomy (do not exceed 30-degree bending to prevent material fatigue)
-
For hardhat or helmet environments , prioritize over-the-ear models over in-ear types to avoid liner compression against acoustic tubes
How to Use Walkie Talkie Earpiece Equipment: Professional Communication Protocols
Understanding how to use walkie talkie earpiece systems extends beyond physical installation to encompass transmission discipline and hearing conservation.
Standard Transmission Sequence

-
Pre-PTT Pause: Depress the PTT button fully, then wait approximately 0.5 seconds before speaking. Radios require brief transmitter activation time; premature speech results in clipped initial syllables
-
Speech Modulation: Maintain normal conversational pace and volume. Hytera HP7 and comparable digital models feature AGC (Automatic Gain Control); shouting causes audio clipping at the receiver, while whispering may fall below voice-activation thresholds
-
Microphone Distance: Whether using Motorola R2 compact PTT modules or Yaesu shoulder microphones, maintain a stable 15 cm distance from the lips. Avoid significant head movement during transmission to prevent volume fluctuations
Volume Management and Hearing Protection
-
Set receive volume to the minimum audible level required for comprehension, not maximum output. Sustained high-volume in-ear monitoring is a primary contributor to noise-induced hearing loss in occupational settings
-
In high-noise environments, if volume must exceed 80% for intelligibility, inspect earbud seal integrity or upgrade to circumaural noise-reducing headsets
-
Implement a maximum continuous wear duration of 4 hours, followed by 10-minute removal periods to allow ear canal ventilation
Structural Comparison
Different physical configurations exhibit significant variations in comfort, concealment, and environmental adaptability. Selecting the appropriate type is a prerequisite for mastering how to wear a walkie talkie earpiece effectively.
| Comparison Dimension |
 Over-the-Ear(D hanger)
|
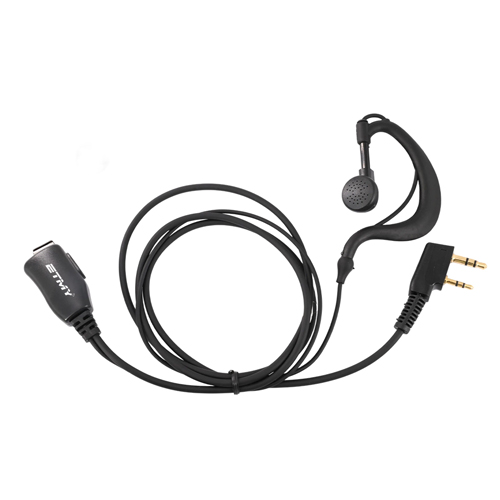 In-Ear — Earbud Type(G Type)
|
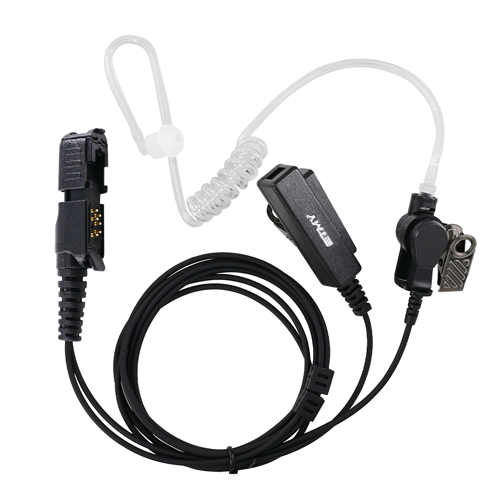 In-Ear — Acoustic Tube Type
|
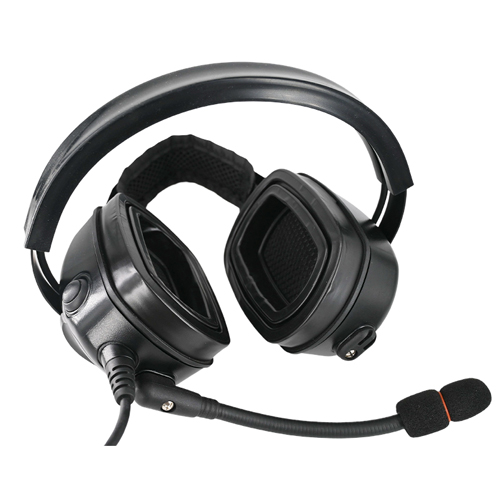 Headband Headset
|
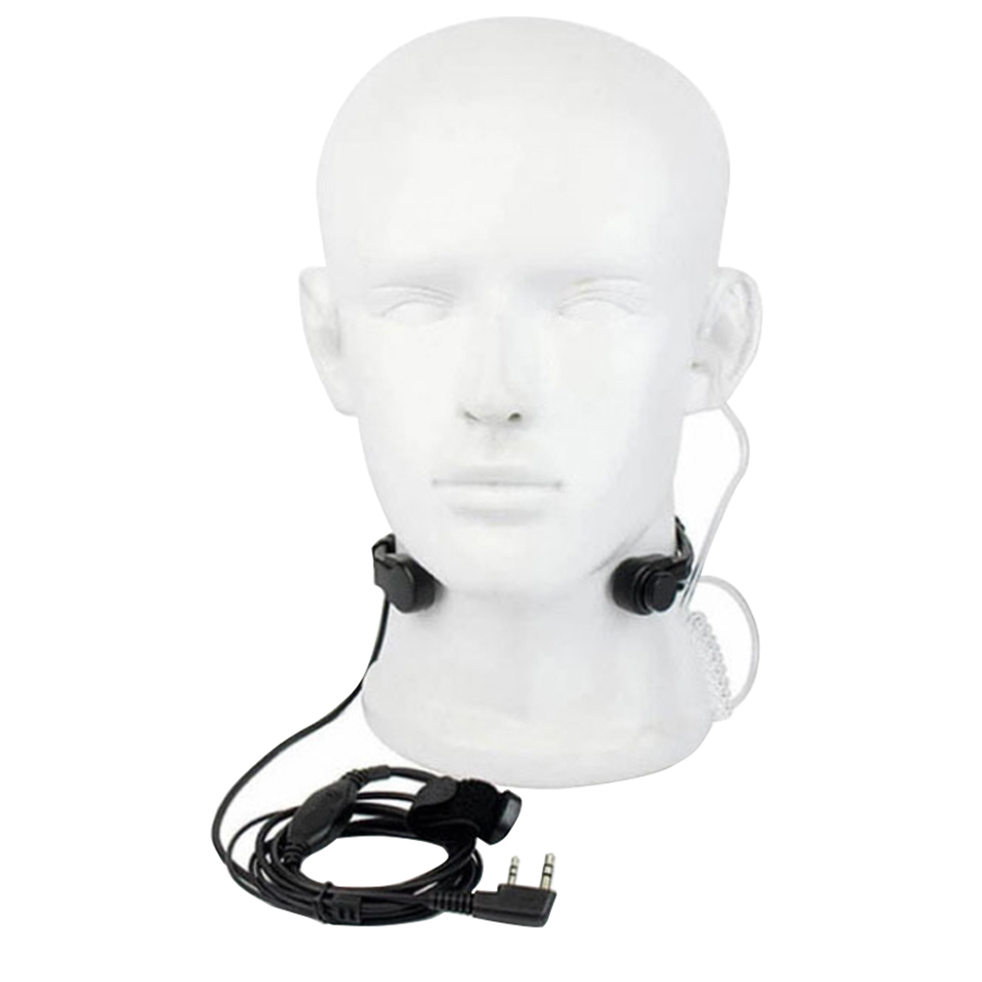 Throat Mic / Bone Conduction
|
|---|---|---|---|---|---|
| Structural Characteristics | Hook secures to outer pinna; speaker suspends near canal entrance | Silicone earbud inserts directly into ear canal; speaker integrated | Earbud at canal entrance; sound transmitted via transparent tube from remote speaker | Large earcups enclose entire pinna; headband distributes pressure | Throat: sensors detect laryngeal vibrations; Bone: transducers vibrate against cheek/temporal bone |
| Wearing Comfort | Moderate; pinna pressure builds, causing clamping discomfort over time | Low; pronounced foreign-body sensation in canal, prone to swelling | Moderate; lightweight earbud but tube routing creates constriction sensation | High; pressure distributed across earcups, though headband may cause temporal compression | Moderate; throat strap can irritate neck skin; bone conduction pads cause vibration fatigue at high volume |
| Concealment | Good; wiring concealable beneath collar | Excellent; minimal visual profile, nearly undetectable | Good; transparent tube is discreet but may reflect under direct sunlight | Poor; substantial visual presence, immediately noticeable | Excellent (throat mic under collar); Good (bone conduction visible as headband) |
| Environmental Noise Isolation | Weak; open design permits ambient sound ingress | Moderate; physical seal provides passive attenuation | Moderate; comparable to earbud type, tube adds no additional isolation | Strong; earcup seal with cushioning creates physical noise barrier | N/A (throat/bone models do not isolate; they bypass the ear entirely) |
| Hygiene and Maintenance | Easy to clean; contacts only pinna skin | Requires frequent tip replacement; deep canal insertion risks bacterial proliferation | Requires periodic tube replacement; earbud section same as earbud type | Easy to clean; earpads detachable and replaceable | Excellent; ear canal remains completely unobstructed |
| PPE Compatibility | Excellent; does not interfere with hardhats or safety glasses | Poor; conflicts with foam earplug hearing protection | Poor; tube vulnerable to compression by helmet liner | Poor; severe conflict with hardhats and protective eyewear | Throat: sanitize strap and sensors after each shift; Bone: clean transducer pads with alcohol wipes |
| Optimal Application Scenarios | Hotel services, security patrol, event execution (frequent donning/doffing) | Covert surveillance, VIP close protection, theater intercom | Security command, rail transit, industrial inspection (standard issue) | Airport ground crew, shooting ranges, heavy machinery operation (high-noise environments) | Tactical operations, firefighting, motorsports, concert security (extreme noise + situational awareness required) |
| Recommended Single-Wear Duration | 4–6 hours | 2–3 hours | 3–4 hours | 6–8 hours | 3–5 hours (throat); 4–6 hours (bone) |
Brand-Specific Fitting Considerations
The R7, Motorola's 2025–2026 flagship professional digital radio, incorporates a keyed M11 connector with IP68-rated waterproof sealing. When fitting compatible earpieces, insertion must produce an audible click indicating lock engagement; forced rotation risks detent damage. The R5 targets mid-tier commercial markets, sharing R7 connector geometry but omitting reinforced locking structures, requiring gentler handling during insertion and removal.
Hytera HP7 / HP6 Series
Hytera digital radios employ a reverse-lock connector physically incompatible with Kenwood K1 standards. When fitting Hytera OEM earpieces, align the red orientation indicator on the connector housing before vertical insertion. Select high-tier Hytera models support Bluetooth accessories, enabling wireless bone-conduction earpieces that eliminate cable management entirely.
Yaesu and ICOM (Amateur / Professional Radio)
Yaesu FTM-500D and comparable amateur models utilize 3.5mm + 2.5mm dual-pin interfaces with extensive third-party accessory availability. ICOM IC-F series radios, however, employ proprietary narrow-pitch connectors requiring ICOM-certified accessories. For extended monitoring sessions common in amateur operations, select soft silicone earbud tips rather than rigid plastic to minimize pinna compression pain.
Kenwood/Baofeng Series
Baofeng radios adopt the ubiquitous Kenwood K1 2-pin standard, offering the broadest and most economical accessory ecosystem. Caution is advised: numerous low-cost earpieces utilize copper-clad aluminum conductors with limited flex life. Specify reinforced models with conductor gauges ≥2.5mm, and avoid coiling excess cable around UV-82 rotating antennas to prevent transmission efficiency degradation.
Kirisun and Caltta (Private / Public Network Convergence)
Kirisun DP series private-network radios maintain partial Hytera connector compatibility, while Caltta eChat PoC terminals predominantly utilize Type-C or Bluetooth connectivity. For ZTE GoTa Bluetooth earpieces, initiate pairing mode via extended button press, then complete binding through the radio or paired smartphone interface before operational use.
Conclusion
How to put on a walkie talkie earpiece is a foundational competency for any professional relying on two-way radio communication, while how to use walkie talkie earpiece equipment with proper protocol reflects operational professionalism. From the reinforced M11 interface of the Motorola R7 to the universal K1 standard of the Baofeng UV-5R, from Hytera's reverse-lock mechanism to Yaesu's dual-pin configuration, understanding device-specific characteristics is prerequisite to achieving comfortable, reliable wear. Enterprise procurement teams are advised to request sample units from specialized suppliers such as ETMY Talk for fit-testing, ensuring triple compatibility across radio model, employee ear anatomy, and operational environment.
A grounding error can instantly fry your radio—Installation guide for radio system lightning protection
How exactly do you use a newly acquired PoC radio?
Related Article

Most radio operators never take grounding seriously—until their gear is fried. This piece exposes three fatal grounding traps, from shallow rods to mixed signal-and-power grounds, then hands you a six-step, code-compliant checklist drawn from NEC Article 810 and IEEE Std 142. Copy this homework instead.
A grounding error can instantly fry your radio—Installation guide for radio system lightning protection
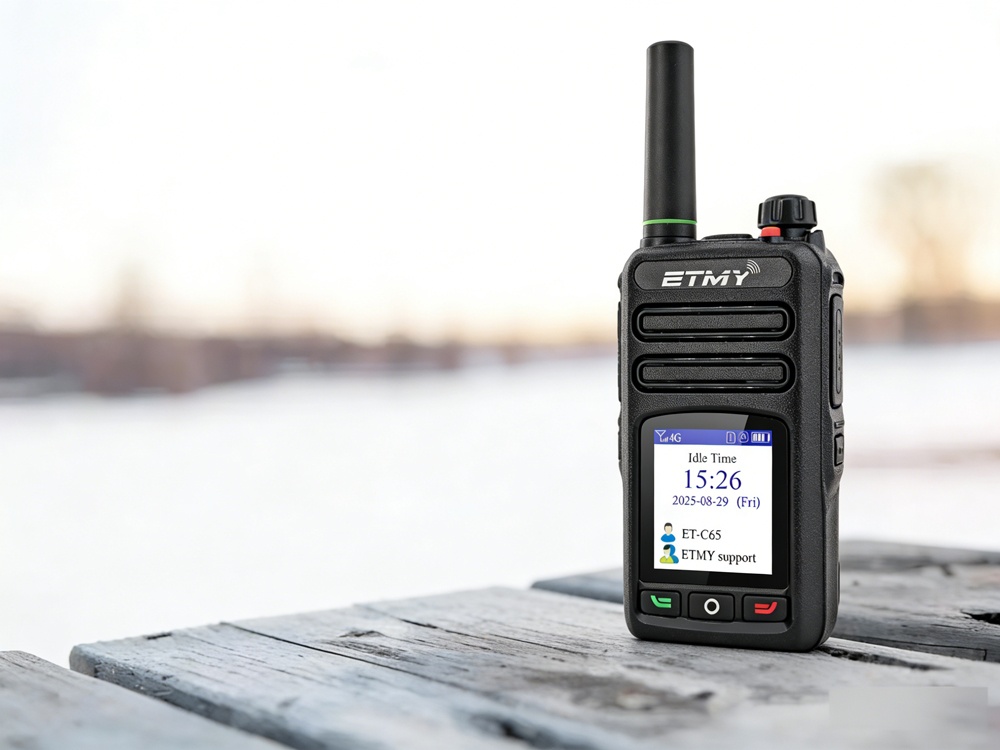
A recent industry report highlights PoC radio adoption for faster, long-distance team communication. Designed for cellular network connectivity, these radios improve coordination in public safety, logistics, and field operations, while offering beginner-friendly setup guidance to ensure reliable activation and compliance.
How exactly do you use a newly acquired PoC radio?
CTCSS function on walkie-talkies covers a frequency range from 67.0Hz to 250.3Hz. When transmitting in analog sub-tone mode, it transmits by continuously superimposing low-frequency, inaudible signals onto the carrier frequency, ensuring that only receivers receiving the same frequency can interpret the signal. This achieves anti-interference capabilities or allows the receiver to reject signals from other third parties.
What is ctcss on a walkie talkie? how to turn on?